JavaFx 9 Tutorial - Part 1: Scene Builder
Introduction
This tutorial will teach you how to create a new JavaFX application in IntelliJ, and to use the SceneBuilder to create a layouts for your application.
Prerequisites
- Latest Java JDK 9 (includes JavaFX 9)
- IntelliJ (2018.2 or later)
- SceneBuilder 8 (provided by Gluon as Oracle no longer ships the tool in binary form)
Do remember the installation path to SceneBuilder 8 as we will need it to configure IntelliJ in a later step.
IntelliJ Configurations
If this is the first time using IntelliJ, you need to tell IntelliJ where to find JDK 9 and SceneBuilder.
Configuring JDK 9
- On the Welcome screen, press
Configure→Project Default→Project Structure.
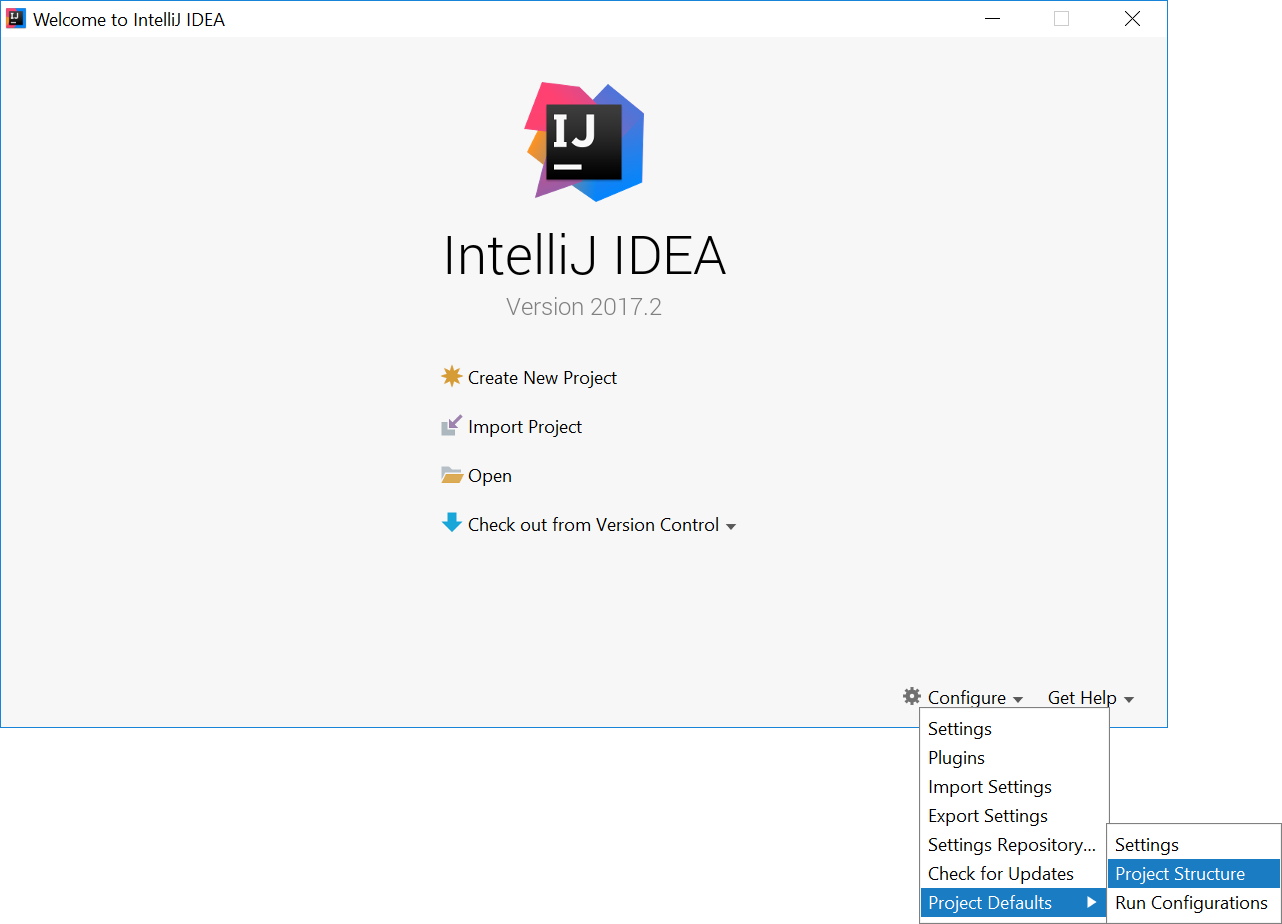
- If you already have a project open, go to the Welcome screen by going to
File→Close Project.
- Under
Project SDK:, pressNew...→JDK. - Select the directory that you install JDK on, and press
OK. - Under
Project language level:, select9 - Modules, private methods in interfaces etc..
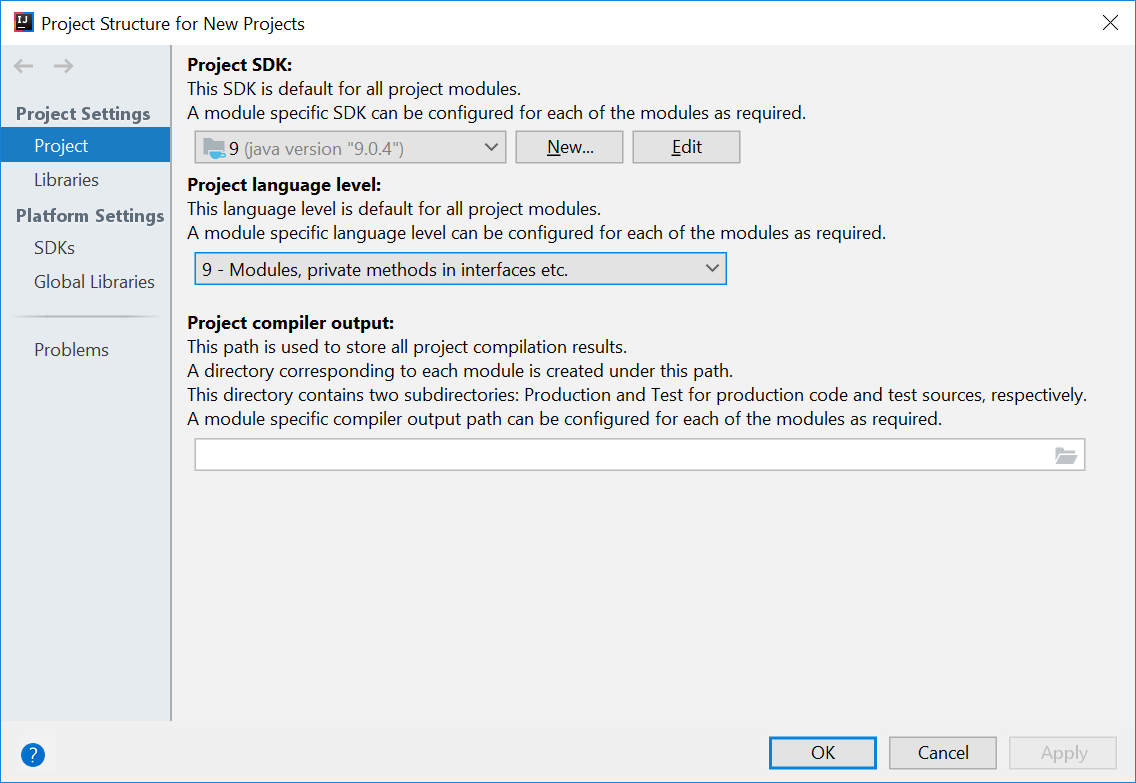
- Press
OKagain.
Configuring Scene Builder
- On the Welcome screen, press
Configure→Settings. - On the left hand side, select
Languages & Frameworks→JavaFX - Under
Path to SceneBuilder:, select the path to where SceneBuilder is installed (e.g.C:\Users\Admin\AppData\Local\SceneBuilder\SceneBuilder.exeon Windows)

Helpful Links
The JavaDocs will come in handy when writing your own JavaFX applications:
Additionally, Oracle also has a tutorial on JavaFX if you are interested.
Create a new JavaFX Project
- On the Welcome screen, press
Create New Project.
- If you already have a project, you can create a new project by going
File→New→Project....
- On the left side, select
JavaFX. Make sure that the Project SDK is set to9andJavaFX Applicationis selected.
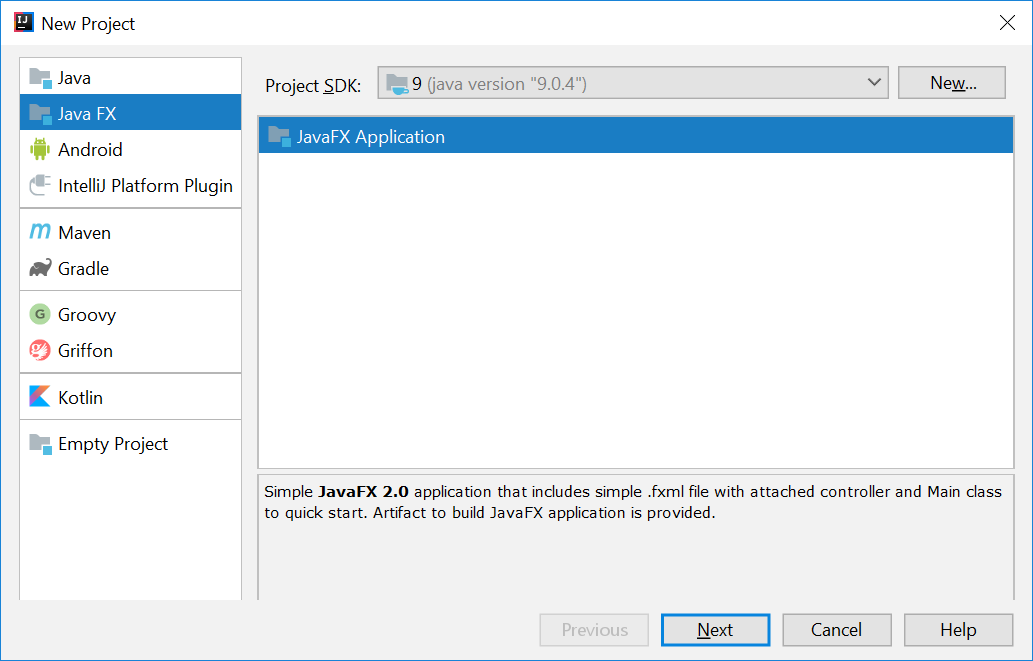
- Press
Next. - Give a name for the application (e.g.
AddressApp), and specify a suitable location. - Press
Finish. If prompted to create a new directory, just pressOK.
Remove the sample package and its content. We will manually create our own package and resources in our tutorial.
We will also have to set up the IDE further, so that warnings and errors show up correctly when working with Java 9:
- Go to the menu
File→Project Structure. - Under
Project language level:, ensure that9 - Modules, private methods in interfaces etc.is selected.
Create the Packages
In We will create a package for each of the component. Ensure that your Project pane is open (Alt+1). Right click on the src folder, and select New → Package:
seedu.address- contains the controller classes (i.e. the part that deals with the business logic)seedu.address.model- contains the model classes (i.e. the part that deals with data)seedu.address.view- contains the views (i.e. the part that deals with presenting the data to the user)

In subsequent tutorials, our view package will also contain some controllers that are directly related to a single view. We will call them view-controllers.
Create the FXML Layout File
There are two ways to create the UI:
- Use FXML, which is an XML format.
- Programmatically create the interface in Java.
We will use FXML for most parts, so that we can separate the view and controller from each other. Furthermore, we are able to use the Scene Builder tool to edit our FXML file. That means we will not have to directly work with XML.
Right click on the view package, and press New → FXML file. For the file name, type PersonOverview.fxml.
Design with Scene Builder
Right-click on PersonOverview.fxml and choose Open with Scene Builder. Now you should see the Scene Builder with just an AnchorPane (visible under Hierarchy on the left).
If IntelliJ prompts for a location of the SceneBuilder executable, make sure to point to where you install SceneBuilder.
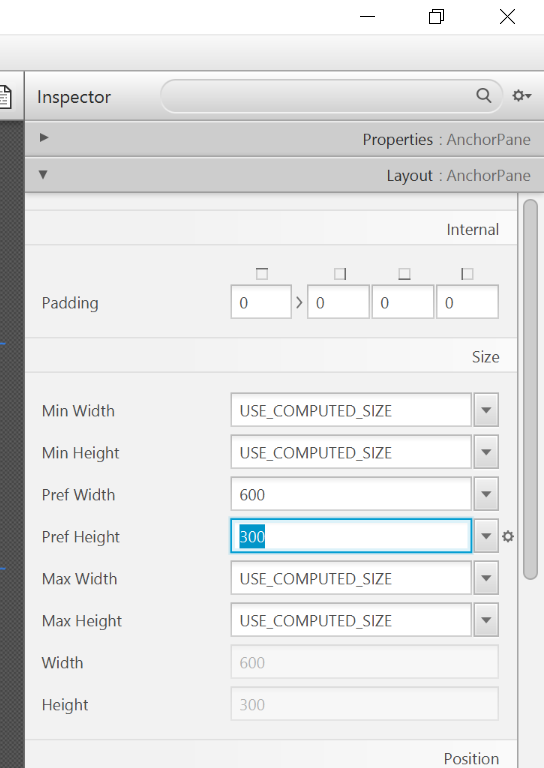
- Select the
Anchor Panein your Hierarchy, and adjust the size under Layout (right side). (Pref Width: 600, Pref Height: 300)
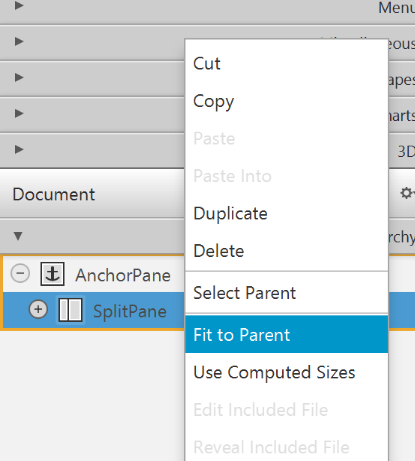
- Add a
Split Pane (horizontal)(underContainers) by dragging it from the Library into the main area. Right-click theSplit Panein the Hierarchy view and selectFit to Parent.
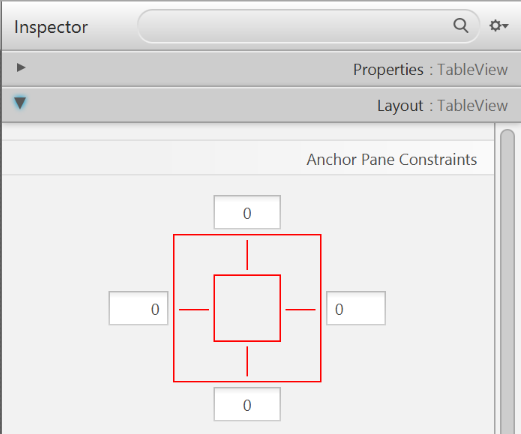
- Drag a
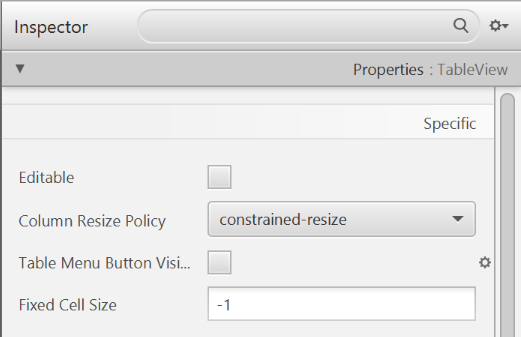
TableView(underControlsin Library view) into the left side of theSplitPane. Select theTableView(not a Column) and set the following layout constraints in the Inspector to theTableView. Inside anAnchorPaneyou can always set anchors to the four borders (see this page for more information on Layouts).
-
Go to the menu
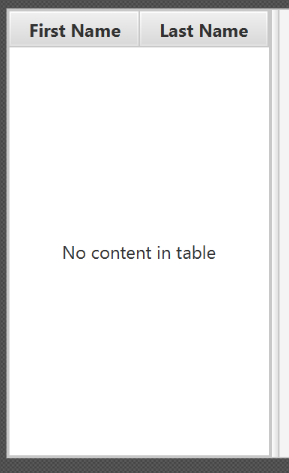
Preview→Show Preview in Windowto see whether the layout configuration is done correctly. Try resizing the window. TheTableViewshould resize together with the window as it is anchored to the borders. -
Change the column text (under Properties) to "First Name" and "Last Name".
- Select the
TableViewand chooseconstrainted-resizefor the 'Column Resize Policy'. This ensures that the columns will always fill up the entire available space.
- Add a
Labelon the right side with the text "Person Details:". Adjust the layout using anchors (Top: 5, Left: 5. Right: Blank, Bottom: Blank).
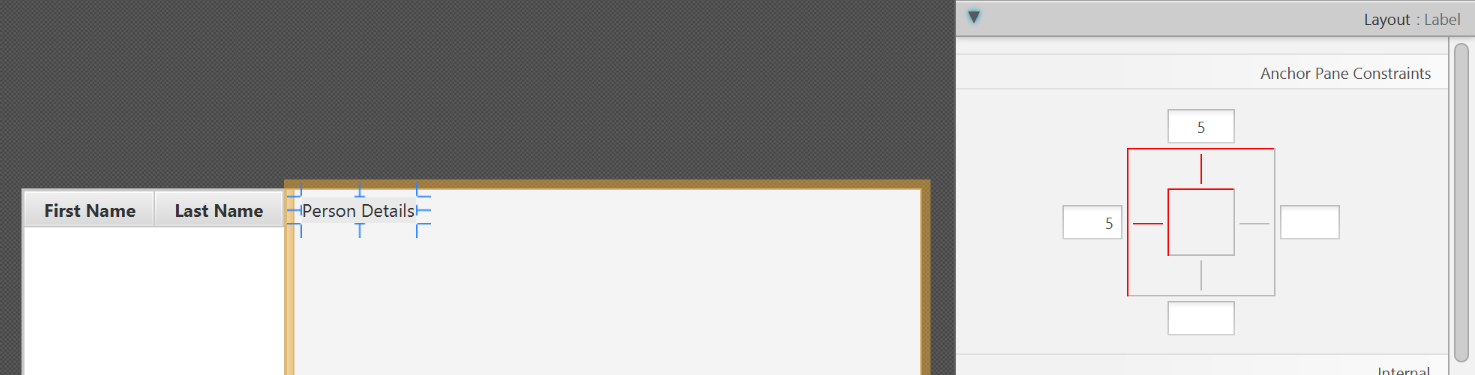
You can use the Search Bar at the top of Library/Inspector to find the respective controls/properties.
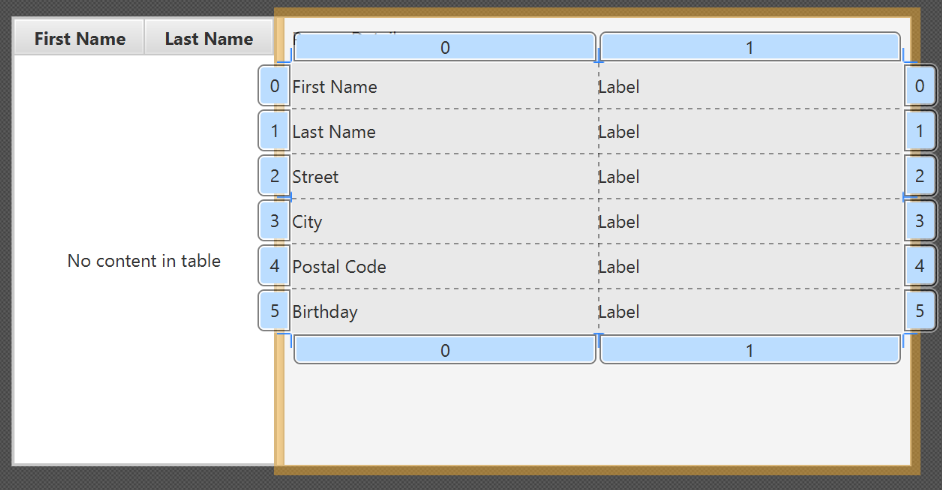
- Add a
GridPaneon the right side. Select it, and adjust its layout using anchors (Top: 30, Left: 5, Right: 5, Bottom: Blank).

- Add the following labels to the cells, such that the grid is of this form:
| First Name | Label |
|---|---|
| Last Name | Label |
| Street | Label |
| City | Label |
| Postal Code | Label |
| Birthday | Label |
To add a row to the GridPane, select an existing row number, right click the row number and choose "Add Row Below".

- Add a
ButtonBarat the bottom. Add three buttons to the bar ("New...", "Edit...","Delete"). Adjust the anchors so that it stays at the bottom right (Top: Blank, Left: Blank, Right: 10, Bottom: 5).
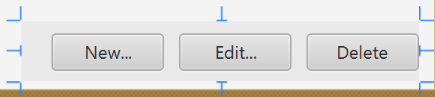
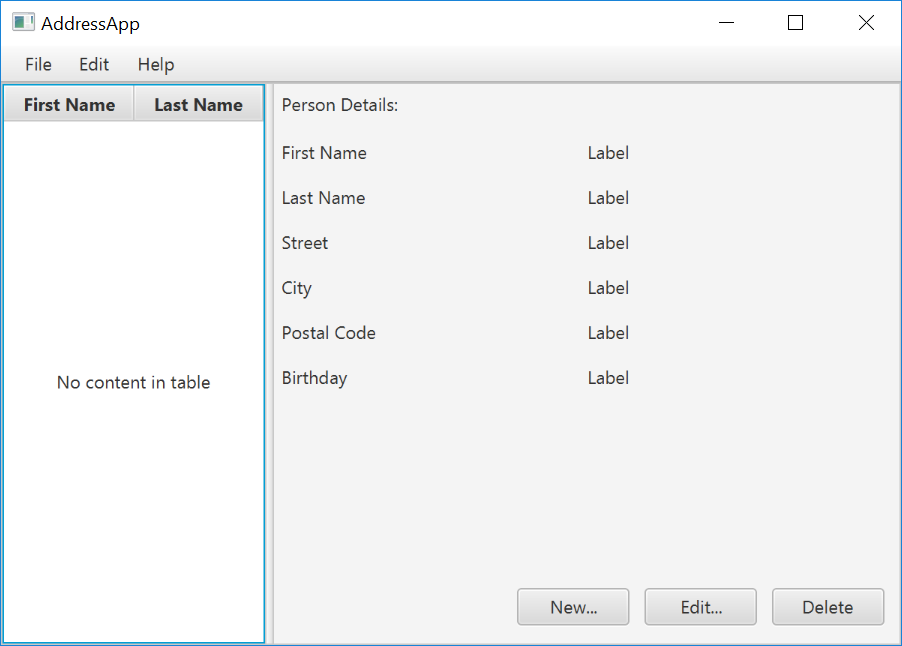
- Now you should see something like the following. Use the
Previewmenu to test its resizing behaviour.
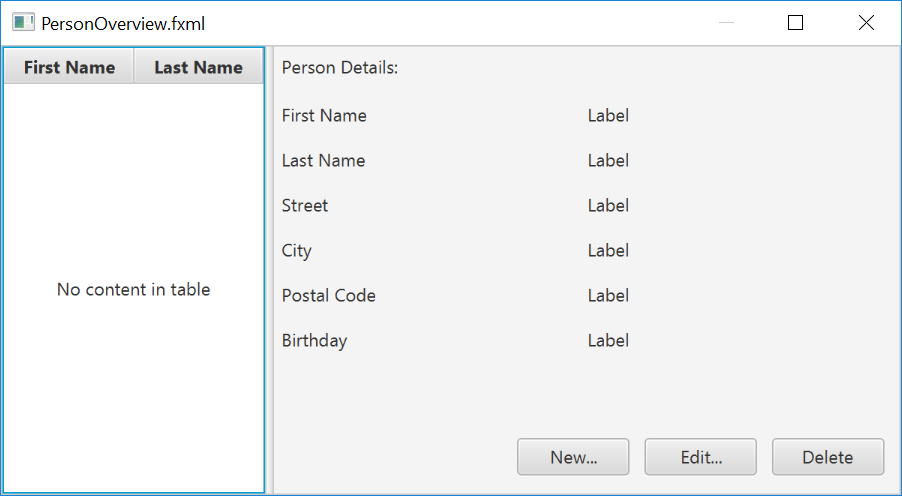
- Save the
.fxmlfile.
Create the Main Application
The PersonOverview.fxml that we just created only contains the content of our entire application. We need another FXML for our root layout, which will contain a menu bar and wraps PersonOverview.fxml.
- Inside IntelliJ, right click on the
viewpackage, and pressNew→FXML file. For the file name, typeRootLayout.fxml. - Right-click on
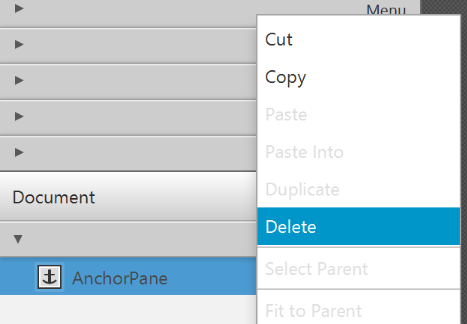
RootLayout.fxmland chooseOpen with Scene Builder. - Delete the
AnchorPane. We will use another pane for our root layout.
- Add
BorderPaneby dragging it from the Library view into the main area.
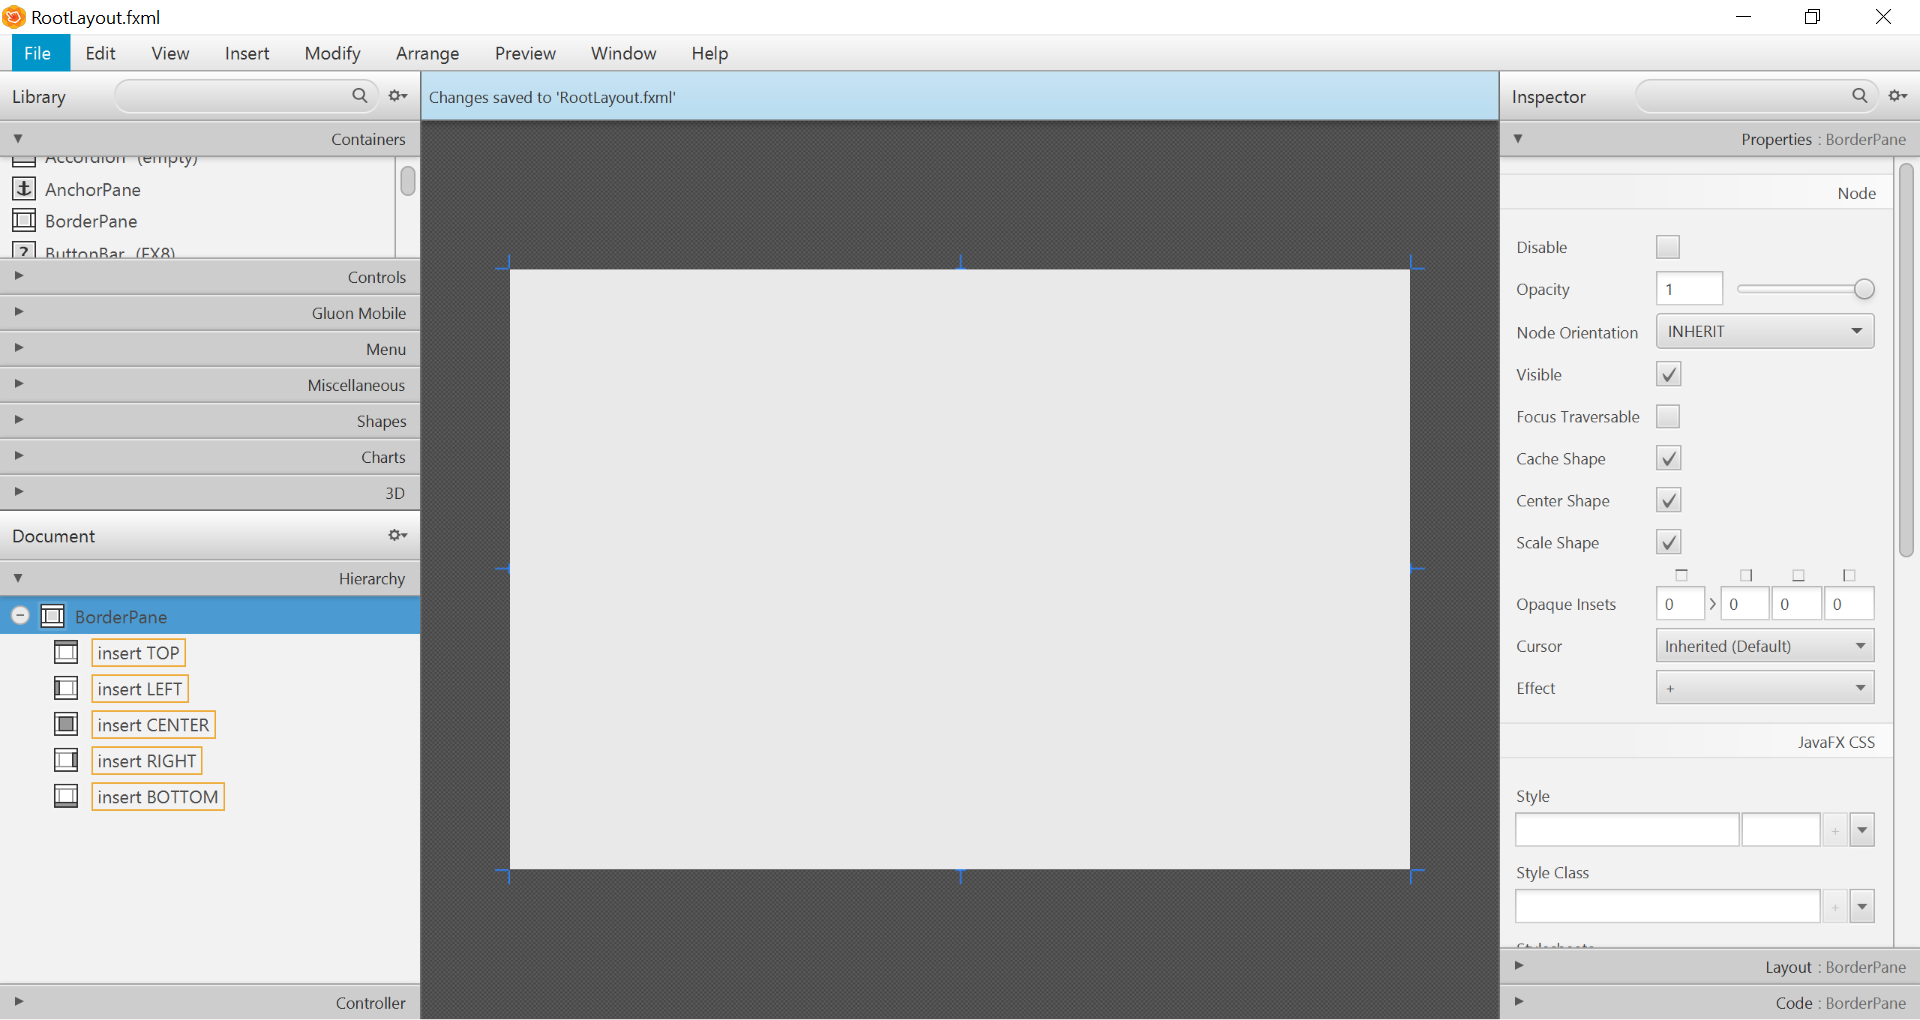
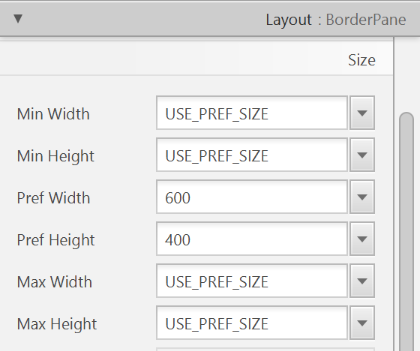
- Resize the
BorderPane(Pref Width: 600, Pref Height: 400)
- Add a
MenuBarinto theinsert TOPslot. We will not implement menu functionality for now.

The JavaFX Main Class
Now, we need to create the main Java class that starts up our application with the RootLayout.fxml and adds the PersonOverview.fxml in the center.
Right-click on your seedu.address package, and choose New → JavaFXApplication. For the class name, type MainApp.
The generated MainApp.java class extends from Application and contains two methods. This is the basic structure that we need to start a JavaFX Application. The most important part for us is the start(Stage primaryStage) method. It is automatically called when the application is launch() from within the main() method.
As you see, the start(...) method receives a Stage as parameter. The following graphic illustrates the structure of every JavaFX application:
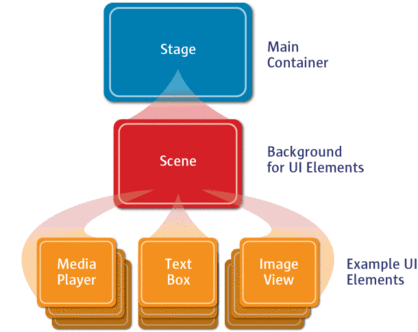
Image Source: http://www.oracle.com
It's like a theater play: The Stage is the main container which is usually a Window with a border and the typical minimize, maximize and close buttons. Inside the Stage you add a Scene which can, of course, be switched out by another Scene. Inside the Scene the actual JavaFX nodes like AnchorPane, TextBox, etc. are added.
See this page for more info on working with the JavaFX Scene Graph.
Open MainApp.java and replace the code with the following:
MainApp.java
package seedu.address;

import java.io.IOException;

import javafx.application.Application;
import javafx.fxml.FXMLLoader;
import javafx.scene.Scene;
import javafx.scene.layout.AnchorPane;
import javafx.scene.layout.BorderPane;
import javafx.stage.Stage;

public class MainApp extends Application {
    private Stage primaryStage;
    private BorderPane rootLayout;

    @Override
    public void start(Stage primaryStage) {
        this.primaryStage = primaryStage;
        this.primaryStage.setTitle("AddressApp");

        initRootLayout();

        showPersonOverview();
    }

    /**
     * Initializes the root layout.
     */
    public void initRootLayout() {
        try {
            // Load root layout from fxml file.
            FXMLLoader loader = new FXMLLoader();
            loader.setLocation(MainApp.class.getResource("view/RootLayout.fxml"));
            rootLayout = loader.load();

            // Show the scene containing the root layout.
            Scene scene = new Scene(rootLayout);
            primaryStage.setScene(scene);
            primaryStage.show();
        } catch (IOException e) {
            e.printStackTrace();
        }
    }

    /**
     * Shows the person overview inside the root layout.
     */
    public void showPersonOverview() {
        try {
            // Load person overview.
            FXMLLoader loader = new FXMLLoader();
            loader.setLocation(MainApp.class.getResource("view/PersonOverview.fxml"));
            AnchorPane personOverview = loader.load();

            // Set person overview into the center of root layout.
            rootLayout.setCenter(personOverview);
        } catch (IOException e) {
            e.printStackTrace();
        }
    }

    /**
     * Returns the main stage.
     */
    public Stage getPrimaryStage() {
        return primaryStage;
    }

    public static void main(String[] args) {
        launch(args);
    }
}
The various comments should give you some hints about what's going on.
Importing JavaFx 9
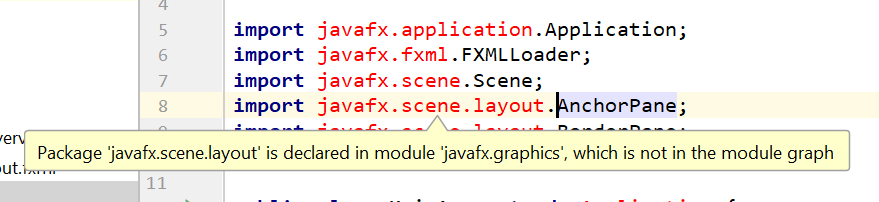
JavaFx 9 is a separate module from Java 9. We must ensure that the modules are imported correctly.
Notice that IntellJ will complain about the imported modules "not being in the module graph":
To fix this:
- Ensure that your Project pane is open (Alt+1). Right click on the
srcfolder, and selectNew→module-info.java: - Add the following
requiresandexportsin order to import and export the modules correctly:
module AddressApp {
    requires javafx.graphics;
    requires javafx.fxml;
    requires javafx.controls;

    exports seedu.address;
}
Running the Application
If you run the application now (right click MainApp.java and select Run MainApp.main()), you should see something like this:
Possible Issues
If JavaFx fails to load PersonOverview.fxml, you might get the following error message:
javafx.fxml.LoadException:
/.../AddressApp/out/production/AddressApp/seedu/address/view/PersonOverview.fxml:15
To solve this issue, open PersonOverview.fxml normally in IntelliJ and ensure that there is no such attribute around:
fx:controller="seedu.address.view.PersonOverview"